


Now that I am grown I hang out my own feeders and I enjoy building my own. If you enjoy hummingbirds and enjoy making your own feeders, I hope you will enjoy this and find it helpful. I have a couple different designs that I have built but I will start with a popular design right now that uses bottles from wine, sparkling juice, soda and even mason canning jars with a feeder tube (or two, or three or four) attached. There are many places that sell pre-made feeder tubes but I made my own using things I had on hand and it was simple and of course much cheaper. I am going to try and link this blog to a site online where you can also purchase these great recycled feeders if you choose.
 1st I drank a bottle of sparkling juice with my kids and husband over a pot roast dinner and saved the bottle. This particular variety of sparkling juice had a twist on and off cap so I decided to use that to my advantage (but I will also show ways to make feeder tubes that will work with bottles that do not have resealable caps). 2nd
I looked around the house and found some extra, flexible, plastic
tubing lying around. (Truth be told it was some old oxygen tubing that
my son required when he was born. Thank heaven he no longer needs it
for its original purpose, but he does love watching birds outside so I
thought re-purposing the tubing for a bird feeder was perfect!) If you
have some flexible copper tubing or anything similar it will work fine
too. I cut the tubing into about 6" sections and then dug through my
drill bits looking for a bit that was the same diameter as my tubing-or
at least fairly close.
1st I drank a bottle of sparkling juice with my kids and husband over a pot roast dinner and saved the bottle. This particular variety of sparkling juice had a twist on and off cap so I decided to use that to my advantage (but I will also show ways to make feeder tubes that will work with bottles that do not have resealable caps). 2nd
I looked around the house and found some extra, flexible, plastic
tubing lying around. (Truth be told it was some old oxygen tubing that
my son required when he was born. Thank heaven he no longer needs it
for its original purpose, but he does love watching birds outside so I
thought re-purposing the tubing for a bird feeder was perfect!) If you
have some flexible copper tubing or anything similar it will work fine
too. I cut the tubing into about 6" sections and then dug through my
drill bits looking for a bit that was the same diameter as my tubing-or
at least fairly close.
3rd Once I found the drill bit I attached it to my power drill and bored a hole through the center of the screw-on cap and inserted the tubing through it. I've heard some people say the tube should be about 2" inside the bottle and 4" out, but I only put the tube in about an 1" or so inside the bottle.


4th Even though the tube fit snugly into the drilled hole of the cap, I fired up the hot glue gun and put a bead around the tube both on the inside and outside of the cap to seal it up. (For non-resealable caps, I simply used a cheap cork, drilled through it, just as I did the twist-off cap, inserted the tube inside with about an 1" inside the bottle and about 4" outside, then sealed it up with hot glue exactly as i did with the cap. Keep a steady hand when drilling the cork as it is soft! )


5th I didn't want bees or other insects crawling up into the tube and I wanted the opening of the tube to be small enough to prevent excess leaking. After some thought, I used some colored electrical tape (hummingbirds are supposed to be drawn to the colors red and yellow) and covered the end of the tube with a small piece,


then secured that piece by wrapping a little electrical tape around the outside of the end of the tube. With the end of the feeder tube successfully sealed off, I poked a small hole through the tape on the end of the tube with a paperclip and wiggled it around so that it was about the right size for a little hummingbird beak to fit.

 6th I needed a hanger! I had some twine around which would work fine, but i decided to use some stiff wire we had out back that is so miserable to bend that no one ever uses it to fix fences or wire up anything. I like being able to put things to good use and it seemed stiff enough to do the job well. It took a while, using pliers, the bottle and my tabletop to start a nice, curving, spiraling wrap that was small enough on one end to carefully cradle the bottleneck and gradually large enough on the other end to hold the rest of the bottle securely and still have enough left over for a nice hanger. (I used about 30" or so for my large sparkling juice bottle.)
|
| Any bottle with a tight sealing, screw on cap (or cork) can be converted easily, like this mason jar. The same process is used: drill through, insert tubes, add a hot glue seal, tape the ends, poke tiny holes in the tape on the ends and make your hanger. I found that in areas where the hummingbirds are not familiar with the single-tube feeders, I had more success adding a colorful plastic flower made of colored electrical tape to the end. To reduce any excess leaking, I found it was also helpful to wrap small lengths of pliable, left over copper electrical wires around the tubing to point the ends up.   If you would rather purchase these great recycled creations today and make them another day, I am attempting to create a link here. |
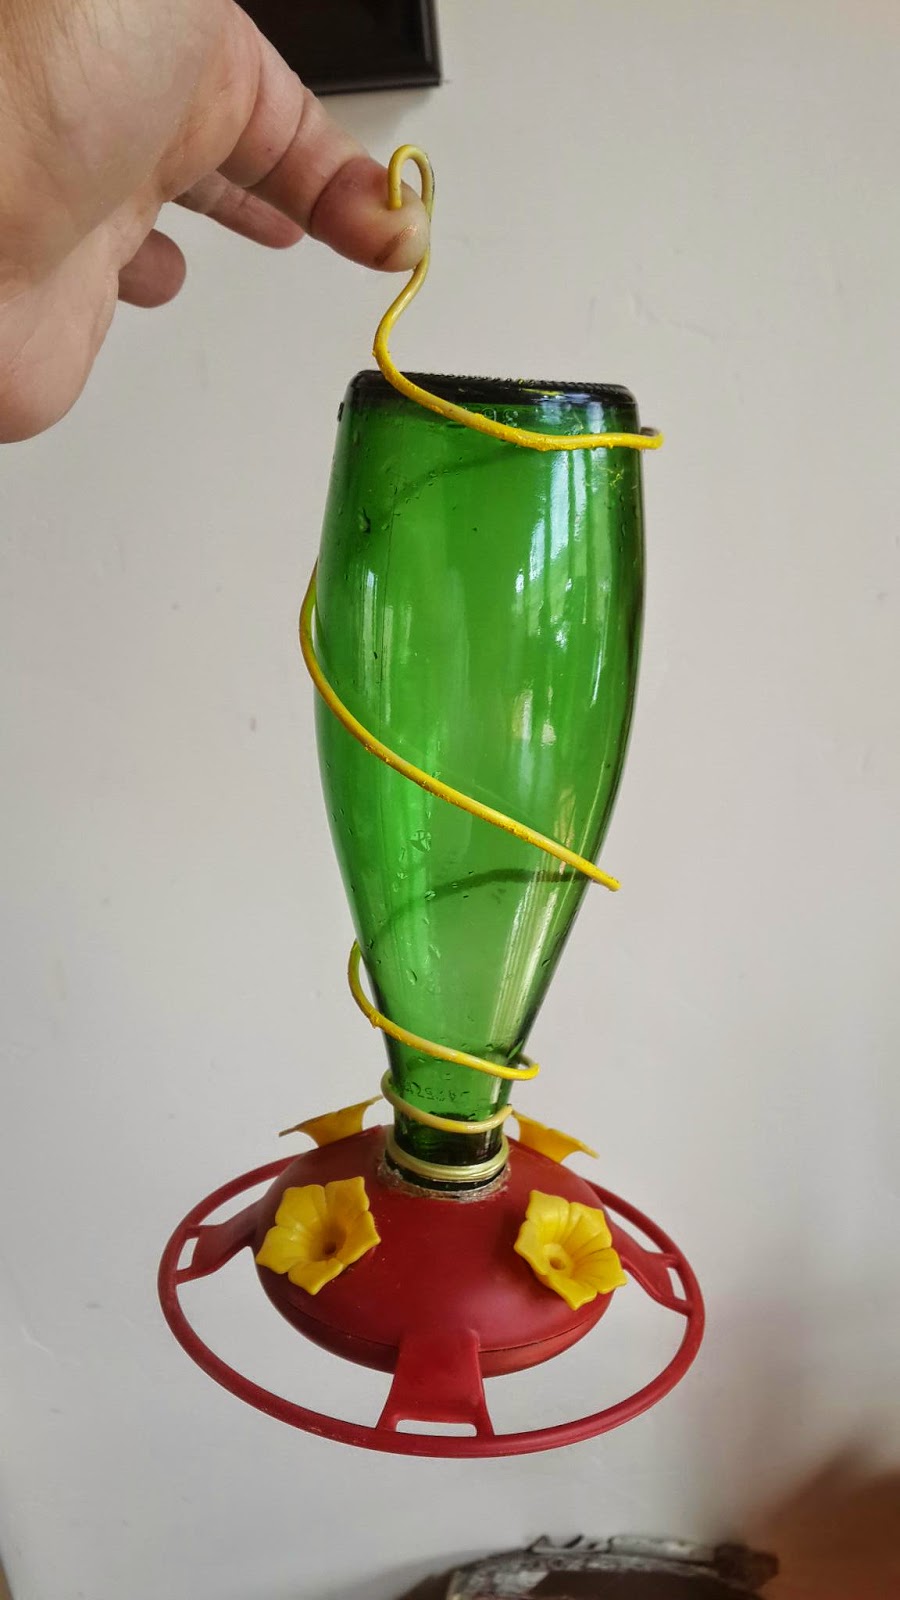 |
| It can also be fun to give your old feeder some new features. I accidentally broke the old plastic bottle on this one and simply re-fitted it with this perrier bottle and made a new hanger for it. The "re-fitting" process required boring a larger hole just the size of the perrier bottle cap, drilling a hole through the bottle cap to allow the the nectar to run into the feeder and hot glueing the outside of the cap into the newly bored hole. Now the bottle simply screws in or out of its cap in the feeder base and is easy to refill. I have a few other designs for feeders that I will try to post pictures of below and If enough folks want to see how to make them, I may post the directions in a later blog or simply make an addition to this. one  |


Nice ideas here tell me do they work good?
ReplyDeleteThanks
Mine do! Hope yours do too!
DeleteTHANK YOU!!! Have been wanting to create some feeders but was too cheap to buy the feeder tubes. I, too, have a supply of O2 tubing....problem solved!!
ReplyDeleteThank you! So glad this was helpful! If you want to skip the feeding tube step, check out my post about the simple soda bottle feeder-nothing required but the lid/cap and the birds love them. Happy constructing:)
DeleteIf you have the Oxygen tubing then you may also have extra RX bottles laying around? If so check out my post on prescription pill bottle feeders:)
DeleteFinally found a use for the outrageous amount of breast feeding tubing I have!
ReplyDeleteAwesome idea! Let me know how they work!
DeleteNice . . . just the direction I needed to go with to make my own! Thank YOU!
ReplyDeleteAwesome! Let me know how yours work!
DeleteI have a beautiful glass hummingbird feeder but the tube in the cork broke in the moving. All the stoppers I've found are made from fake cork which make it very slippery - causes the stopper to fall off when I fill the feeder with the liquid. Do you make and sell any stopper with a real cork? I'm not much of a builder for this project. Thanks, Rosa
ReplyDelete