Showing posts with label re-purposed home. Show all posts

Tuesday, April 14, 2015

the Re-Purposed Home: DIY Converting Lanterns into Electrical Light Fixtures and Lamps


A few years back I started collecting some old rusty lanterns, a few that had probably been my grandpa's.  I loved the look of them and I confess I felt a little nostalgia for my childhood days when we had our cattle drives or camp outs.  On the cattle drives we used an old wood cookstove to cook meals in an antiquated sheep camp and used a couple of old coal oil lanterns for lighting.  The warmth and illumination of the firelight always felt comforting if not magical to me.  I was determined to use the old lanterns I had collected in my home somehow, if nothing else, for decor, but, after a few trips to the hardware store, a few new ideas took shape.  I was sure I could preserve the lanterns, and their antique value, in their entirety while using the lanterns as light fixtures in my home.  Without any cutting, drilling or damage to the lanterns, I found a way to convert them to electric light fixtures and electric lamps.

     On this post I will focus on just lamp making because it has virtually the same steps as the fixtures (and I'm needing to build another lamp right now for my mantle as I robbed the old one to go beside my bed; Darn those mystery novels).  So if you have some old lanterns and you'd like to make light fixtures or lamps out of them, here's how I did it.


1st I wanted my lanterns in as good a condition as possible and most of them were in pretty bad shape.  If you want them rusty and antiqued without their glass globes, handles, etc., then skip this step.  If not, this is what I did.  Most of my lanterns were rusted solid.  To get the rust off and down to whats left of the original paint/patina, pour a regular size bottle of molasses from the grocery store in a 5 gallon bucket of water and place the lantern in the mixture for a day or two, then scrub gently with a pink Brillo pad and rinse.  Yes, it has to be a Brillo pad, not steel wool or anything abrasive.  It was freezing outside when I was soaking my lanterns so I put the bucket of brown goo in the shower and shut the door where it would be out of the way of my kids' little curious fingers and if any dribbled out on accident while I was checking a lantern it would be easy to clean up.  I forgot to tell my husband about my project and he got quite a start when he stepped into the shower with the brown sludge bucket.  (Not to worry, he healed up nicely.)  Most experts will tell you to soak them for only a few days but I actually forgot two of my really rusted lanterns that were soaking in the molasses mixture for a week (this was after I moved the bucket out of the shower to a new, kid-secluded location-so secluded even I didn't notice them apparently).  I don't know if it damaged them, but I know it sure cleaned them up nicely!  I didn't need the Brillo pad at all and I could see a few traces of the original paint colors as well.  After they had been rinsed and dried off I wanted to prevent any further rusting and I like my metal to shine so I sprayed a few coats of clear spray lacquer on my lanterns.  (If you are worried about devaluing your lanterns through the cleaning or restoring phase or are worried about using clear lacquer, hit the internet sites, like lanternnet.com about preserving and cleaning old lanterns.  That's where I learned about the
molasses bath and Brillo pads.)

     After cleaning them up, I wanted to learn enough about my lanterns to order replacement parts like the glass globes that most of them were missing.  There are some great websites out there to help identify your lantern.  Make sure you look all over your lantern for any lettering or numbers as that can make the job much easier.  I found a helpful site, once again it was lanternnet.com, that helped me identify my lanterns and find everything I needed to fix them.  Even if the company that made your lantern no longer exists (as was the case with one or two of mine) there is usually a way to find a part that will work.  I would also like to mention here that if you want to fix the lanterns so that they can be used for their original purpose as coal oil, kerosene or whatever kind of fuel-burning lantern, these websites can help
you there too.

2nd After I replaced the parts I needed, it was time to get my electrical supplies.  I needed a socket, some lamp cord, a switch, a couple of small wire nuts to secure the wire connections from the lamp cord to my socket and for this type of lantern, a can of green chiles (just because that size of can fit the dimensions I needed...and I knew how to cook a favorite family dish with the chiles).

3rd I removed the part of the lantern that holds and adjusts the wick and flame size. (I can't remember its technical name and I'm willing to bet most of you don't know or care either.)  Because I didn't want to cut or damage the lantern, I needed to remove this piece.  I have kept all of these pieces and put them in a safe place so that if I want to restore the lamp to its oil-burning glory, I can.  In the meantime I needed a piece that I could manipulate and cut to fit an electrical lightbulb socket.  (If you cannot bear to use a common tin can, hit a big box store and buy a cheap lantern similar to your antique, if you can find one, then strip the part and cut it up.  I used a can.  It worked great, was cheap and the chicken tortilla soup I made with the  green chiles was delicious.)   Next, If you are gifted with tin snips, you can poke a hole in the center of the empty chile can and cut a nice circle just large enough to fit the socket.  I am not gifted with tin snips so I measured my socket and used a drill that diameter.  It can get tricky with a drill so go slowly and I'd recommend wearing protective eye wear and gloves.  After I had the hole drilled and made sure my socket piece would fit, it was time to cut the sides of my can so that it fit the lantern correctly.  (Not all lanterns are the same so make sure you have your can measured and cut correctly to fit.  If you have the glass globe installed in your lantern or the original glass is still there, remove it carefully until you get the can fitted properly and everything wired.) Once I made sure that my can fit into place correctly, I removed it.  This is the time to paint, antique or lacquer this piece, if you like, so that it looks as natural and camoflauged there as possible.
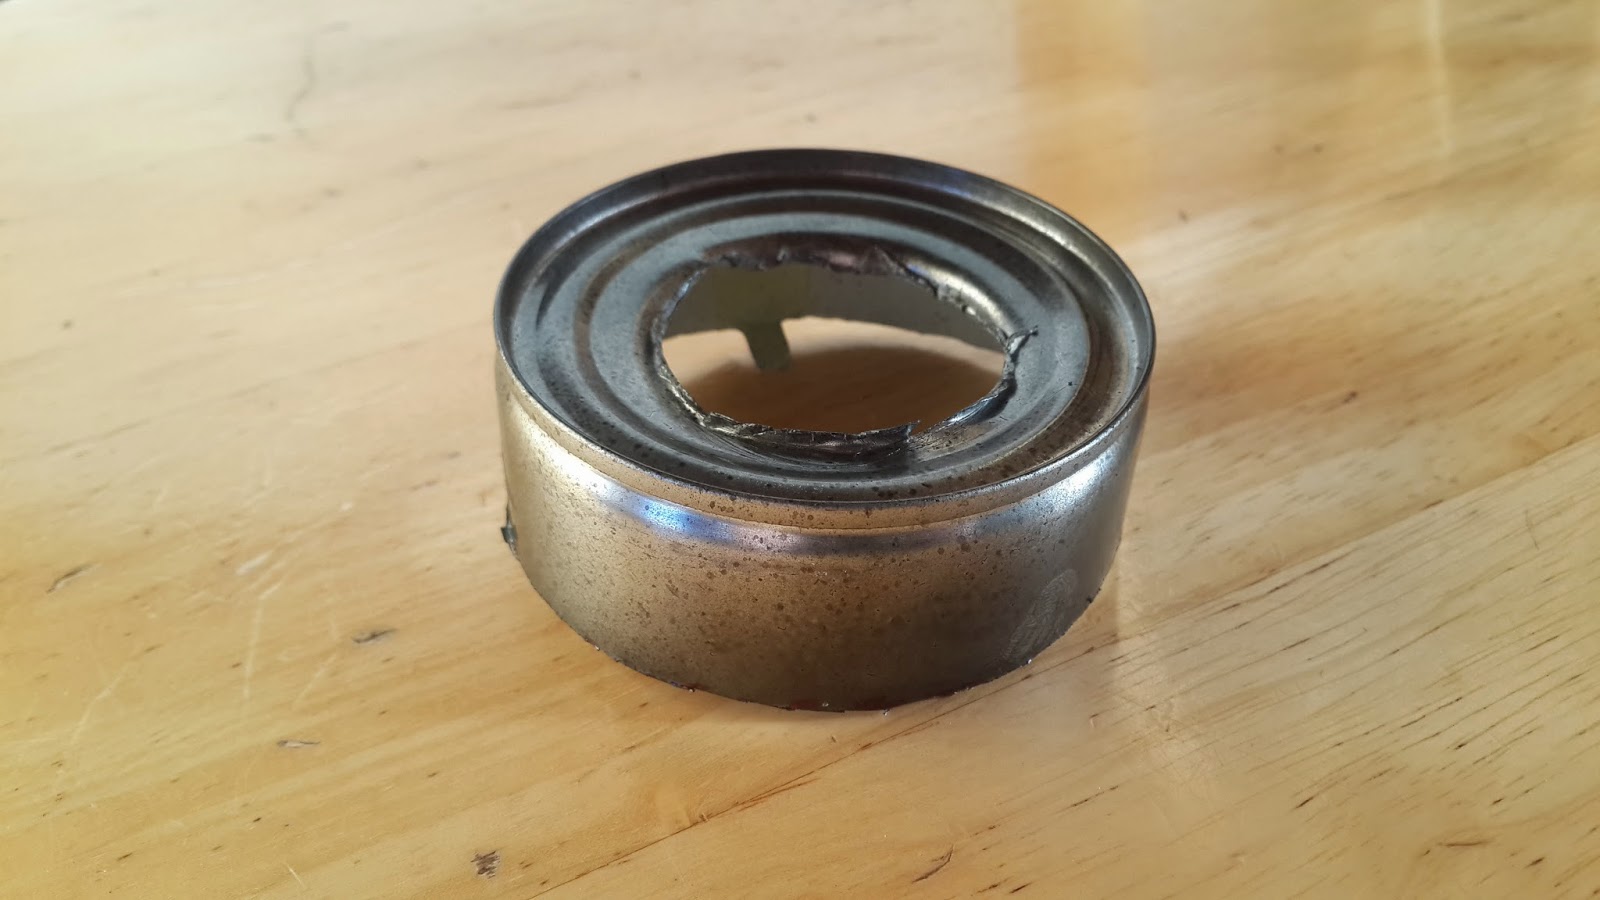
4th I secured the socket to the can and mapped a way to hook up my lamp cord.  For all of the lanterns I encountered, there was a pretty easy way to run the cord so that I never had to drill or cut anything.  For my lamps I usually open the fuel cap and run the cord into the empty fuel area and up through the lantern where the wick would go.  For other fixtures I've run cord up the tubing on the sides and out the venting areas in the top.  For this particular lamp, the cord went in the
fuel cap opening and up through the center where I split the cord (about 3 inches back from the end of the lamp cord) and stripped off the plastic coating on the lamp cord about 1/2" on each side.  For my first projects i used a pocket knife.  Electrical wiring pliers are so much handier but not necessary if you don't have 'em)  I then connected the cord to my handy socket by holding both wire ends together, ends pointing to the ceiling, and twisting the wires together in a clockwise direction and securing and covering them with the two small wire nuts.  If you twist the wires in a clockwise direction then the wire nuts will actually tighten and improve the wire connection as you twist them on, if not the wire nuts may weaken the connection and "un-twist" your wires.  (On lamp cord if you look closely you will see that one of the sides of the cord is smooth while one is ribbed.  The smooth side is usually the hot or black wire and connects with the black, while the ribbed connects with the white or neutral wire.)  This done, I pushed the wire nuts and extra lamp cord into the base of the lantern and fastened the can holding the socket into place.

5th put a bulb in the socket, replace the glass globe on your lantern and plug it in.  You've got yourself an antique lantern lamp!
(I will try to include pics of some of my other lantern light fixtures and if there is any interest I may do another post.)


Monday, December 8, 2014

the Re-Purposed Home: DIY Converting a Sled to a Kitchen Light and Pan Rack


When I was a kid my cousins, siblings and I would re-enact the winter olympic bobsled races on our flexible flyer sled, getting as many of us as possible on the thing as we tore down the hill.  The kid at the front did the "steering" (to this day I'm not sure if those things can really be "steered") and the kid at the rear did most of the pushing to get the sled and all its occupants moving and was lucky if he or she found a place to actually get on the sled once it was in motion.  I have fond memories of these times that return every time I see a flexible flyer sled.

Which brings me to the subject of this post.  I was trying to find a unique, rustic light fixture/pan rack for my kitchen and I was not that impressed with what I was finding at the stores (especially in our price range).  I was walking around the barnyard trying to get ideas when I saw it; There in the scrap pile was a beat up flexible flyer sled or at least what was left of it.  My guess is it had been run over by the tractor because all that was left of it were a few scraps of lumber & a mangled pile of metal runners.  Suddenly I knew what I wanted in my kitchen as a pan rack and light fixture. I now have a re-claimed and re-purposed flexible flyer sled with mason jar lights attached for lighting and the runners on the sled work great as a pan rack.  My husband and kids love it, it was cheap to make, filled the need and fit our family and our home.  If you are interested, here's how I did it.


1st I used scrap lumber and a couple of cheap, pre-drilled metal plates from the hardware store to rebuild the sled "enough" so that it would "look" like the real deal and be strong enough to hold lights and pans. A regular sled, still intact, would work fine for this project too.  I just liked the idea of taking something broken and discarded, reclaiming it and making it like new again with a new purpose.  I mapped out how I wanted my lighting to be positioned and how I would suspend it and because I was building this thing anew I made a few alterations in my sled.  I wanted my lights to be attached on the outside of the runners so I made the wooden steering piece just a touch longer to accomodate a pint-sized mason jar on each side.  I also lengthened the rear, wooden, cross piece to do the same.   I wanted my sled to shine so I coated it with clear lacquer to help preserve the wood and the metal runners that I had bent back into place as much as I could.
My hanging-lamp-light-box-cover after I painted it.  It was white when I bought it.

2nd Once my new and improved flexible flyer was built, I headed for the hardware store for electrical supplies and some brown, hemp-looking rope that I thought looked similar to our old sled rope, only tougher so it could easily hold sled, lights and pans suspended above our kitchen island for the next century.  I also picked up some I-screws that would work to secure the rope and sled to my ceiling.  I bought a hanging-lamp-light-box-cover and some red spray paint (I wanted to make the white light box cover match the runners of the sled and I already had the other necessary spray paints to make a good match at home- black, bronze and brown). For the rest of the electrical aspect, I purchased four, 3" long sections of threaded electrical tubing with 4 hex nuts and washers to match, four lamp light sockets that threaded onto the tubing, a drill bit with a diameter just larger than the tubing, 2 very large wire nuts and about 12 feet of gold colored lamp/electrical cord (without any plug-ends so that it would wire directly into my light box).  I had already gauged the distance from my ceiling fixture to where I wanted my sled/pan rack/light to be and knew I needed 12ft of cord to pull it off.  I chose gold electrical cord because I wanted it to match my mason jar lids and rings.

3rd I measured where I wanted the center of my mason jar lights to be and, using my new drill bit, drilled holes through the ends of my "steering piece" and rear cross board.  I then drilled a hole thru the center of each of my mason jar lids for the tubing to go through and threaded the light sockets onto the end of the tubing inside the lid.    (I then realized that for venting/over-heating purposes I would need a few more holes drilled in the lid.  I ended up with 6 extra holes--2 large holes and 4 smaller ones for this purpose)  I threaded the tubing that protruded from the top of the lid through the holes I had just drilled in the wooden pieces and secured it there with a washer and nut on the top of the wooden piece. 


4th I cut my 12 foot cord into 4 equal 3ft-long pieces and split and stripped the ends.  Following the lamp cord instructions, I tied a granny knot in the ends (just like you would begin to tie shoelaces, with the split end of the cord being your laces) then made a hook out of the exposed 1/2" of wire ends and hooked them over the  screws- the smooth sided half of the cord around the hot screw and the ribbed side around the neutral screw-then tightened them down.  After the ends of each of my cords were attached properly to the sockets, I threaded the other ends up through the tubing and on top of the sled.  I painted my light box cover red with a few light sprays of brown, bronze and black to "antique" it and make it match the runners as much as possible.  After it dried, I threaded the cords through the hole in the center and for convenience I tied all my loose ends of cord in an overhand knot to keep it out of the way as I finished.

5th With my electrical stuff ready to go, it was time to make my hangers.  I drilled two more holes into the ends of the "steering piece" just on the inside of the pint-sized jars and two to match on the rear cross piece.  I cut two, 3ft lenths of my hemp rope and doubled them over exactly in half.  I took one piece and threaded each cut end through my newly drilled holes in my "steering piece" and knotted the ends with a couple good knots so they wouldnt pull back through.  I did the same on the rear cross piece and now had two loops of brown rope on the front and back of the sled.  I measured where the sled would hang and installed the I-screws into my ceiling.  At this point I needed help hoisting the sled so I waited for my husband to get home from work and then we were off to the races.  I pulled the end of my loops through the I-screws and when I had pulled the sled up to the desired height, I tied a couple of simple overhand knots in the rope around the I-screws.  Hung!

6th It was time to do the final wiring on this bad boy. I went to my breaker box and cut the power to my kithen. Using a ladder I untied the knot I had put in my cord ends, found all the smooth wire ends and twisted them together and then did the same with the ribbed.  I then twisted all the smooth wire ends together with the black wire inside my light box on the ceiling and capped it with a large wire nut.  The ribbed ones I twisted together with the white wire inside the light box and capped it with a large wire nut as well.  I then slid my new red light box cover up and into place and secured it with a couple screws.  I flipped the breaker back on, put bulbs in all my sockets, twisted the pint-sized mason jars back onto the suspended lids, tried the switch and was amazed that all the lights worked!  I didnt like that some of my cords were lose and visible so I used a finger-pressable staple or two to hold the wires in place (I didnt put them in tightly and certainly didnt damage the coating of the wire cord to do it).  And finished!  Our flexible flyer sled, light fixture and pan rack was complete!  If you are thinking of doing something similar, I hope this has helped!
To see my other mason jar lighting ideas check out my previous post about mason jar lights.

the Re-Purposed Home DIY Mason Jar Light Fixtures

This is my kitchen sink light and I love it!
I love mason jars.  My mother canned delicious fruits, vegetables, juices, jams, etc. and I loved seeing them, freshly out of the canning bath, bright and comforting in the sunlight and then later, during the winter, selecting one of the tasty foods that was sealed in those bottles and enjoying the taste of summer all year long.  We used the bottles for lots of other things too, when they got a chip on the top edge they were handy for holding dry goods or nuts and bolts or just about anything that you wanted a lid on and a clear view of the contents inside.  I love mason jars!  (I even decorated my Christmas tree with a few of them.) 


When we built our home, being who I am, I didn't want to spend much on our light fixtures but I wanted them to be nice looking, warm and inviting as well as functional, meaningful and unique. I decided to make some of our light fixtures out of mason jars.  I had seen some hanging mason jar lights and a shelf lamp or two but they weren't what I had in mind so I set out to the hardware store and found a couple of fixtures that were perfect for what I wanted.  These were inexpensive and easy to find and lent themselves perfectly to what I had in mind. 
$5 fixture with factory globe removed
w/ mason jar-now my kitchen sink light!
Simple fixture-perfect for my lights!

smaller pint-jar fixture for kids' hallway
     In most of my house we have hardware and fixtures that are either black or oil-rubbed bronze so I bought some black, brown and bronze spray paints to experiment with.  Some of the fixtures I decided to paint while others, being black, I left as they were. As far as fixtures go, keep an eye on sizing to make sure they fit your jar size.  If you choose to use a small-mouth jar, you will need to purchase narrower or specialty light bulbs that can get costly after a while. (The same holds true if you decide to use a pint-sized jar instead of the large-mouth, quart-size, which I did in a few places where my ceiling was lower and head space was a consideration.  I used both small-mouth, large-mouth, quart and pint-sized jars and have enjoyed all of them. (I wait for sales on the bulbs that are smaller or narrower and will fit into a pint-size or small-mouth, quart jar.) 
     These light fixtures install simply, just as you would a normal, mass produced factory light. I did have to get some longer bolts to screw in and hold my jars on occasion but they too were easy to find and cheap.  Because the glass cover piece is a mason jar, when I need to replace a bulb, i can usually just turn the jar and remove it without having to unscrew the securing bolts.  Our mason jar lights are also brighter than the "factory light fixtures" and for someone like me who likes brightly lit rooms , that has been an awesome little side note.  We have loved our mason jar lights!  

This is my kitchen island light/pan rack made with 4 pint-sized mason jar lights mounted onto a sled.   I'll be doing a post about my kitchen light fixture/pan rack shortly if you'd like to see how to make one.


Thursday, December 4, 2014

the Re-Purposed Home: DIY Cupboard or Shelf out of an Old Wooden Box


When we built our house my husband gave me free reign to do our downstairs bathroom however I chose but he wanted our upstairs bathroom to be "from this century."  So I put my grandmother's clawfoot tub, one of my grandpa's broken ladders, an old hand pump (that I dug out of an obliging neighbor's loading chute in his corrals), an antique wash basin that my brother gave me, a whiskey barrel, an old, iron wagon wheel rim that my grandpa had saved out in the field, and numerous other antique farm implements, to show my husband just what he was missing.  (I may do a little write up about the bathroom and its oddities later.)  

Unfortunately, the storage space in the whiskey barrel under the sink wasn't doing it for my husband or our guests (Although the smell when the barrel door was opened made everyone suddenly feel celebratory. Apparently it still smells like its old contents).  Anyway, I needed a cabinet and not just any cabinet would do.  It had to be one that fit my rustic, re-purposed decor from a few centuries ago... or at least last century.  Hmmm. I did what I always do when I need building ideas, I walked through the barnyard and dug in the scrap piles (the ones that I'm allowed to dig in...my big sister can get a bit proprietary about the scrap piles) and EUREKA!  There it was, an old box, broken, and some of it rotting and falling apart, but still in good enough shape for my purposes.  I muscled it out of the dirt and took a better look.  It had writing on the side that was faded but some of the letters were still legible-DECEMBER 1941 CHEYENNE WY.  Awesome!  My grandpa saved everything.  Thank you grandpa!  Your granddaughter who is a packrat too, is loving it.  


I hauled it home and hid it from my husband until I could clean it up.  I used a small broom first, then a scrub brush and hot soapy water and finally a hose to rinse it off.  I actually wish I wouldn't have used the scrub brush or hose so aggressively though, as some of the letters became more difficult to read!  If I could do it over again, I'd skip the scrub brush and soapy water and just use a wisk broom and or vacuum and lacquer the heck out of it.  


As I surveyed the box, I decided I needed some more boards, similar in wear and tear, to do some repairs to the box and put in dividers that would work as shelves.  Luckily, another walk around the barnyard and I found some palette lumber that looked very similar to my box lumber.  I decided to do a little spot sanding on my box-not on the lettering-to bring out some of the beauty of the old wood.  I also spot sanded,  measured and cut the palette pieces to fit and, because the wood I was working with was old and splintery, I drilled the holes where I would put the screws first (with a small diameter drill that was just barely smaller than the diameter of my screws) and then screwed them into place.  


Using some spray clear lacquer, I sprayed several coats all over my box and shelves to seal up the old wood and make it shine (which also helps when you need to wipe it down to clean it or dust it!).  I measured my box and my bathroom, made my pencil marks and my husband and I secured it to the wall where it now proudly holds towels and soap and toilet paper. (If I were a better decorator I would have cool stuff in there too...and probably no toilet paper.  Oh well!  At least my company coming over the holidays will be able to find a spare roll in their time of need!)  As silly as it may seem, I love having something, that means something to me, doing double duty as something functional in my home!  


*My husband and I recently built our home (its mostly done..."done enough," anyway) and have re-purposed several items from around the ranch and surrounding area to incorporate into our design.  I will be sharing these different projects in a series called, "The Re-Purposed Home".  If they aren't helpful at all to you, then I hope they will be entertaining!

Tuesday, December 2, 2014

The Re-Purposed Home: DIY Railroad Spike Cabinet Pulls

My husband and I recently built our home (its mostly done..."done enough," anyway) and have re-purposed several items from around the ranch and surrounding area to incorporate into our design.  I will be sharing these different projects in a series called, "The Re-Purposed Home".  If they aren't helpful at all to you, then I hope they will be entertaining!

 Once our cabinets were installed, we realized that we wanted some rustic hardware/pulls for them, if possible, to fit the decor of our cabin.  Being who I am I wanted to  re-purpose items and make them functional and I like items that reflect who we are and where we are.   I grew up a stone's throw from the original transcontinental railroad grade, but years before I came along they'd cut some time off the trip across the country and moved the actual train tracks miles away.  The old railroad grade still exists, and in fact, like many of our "neighbors" out here, we use it as our access road and sometimes forget it was the old railroad track until the occasional road grader causes a rusty, "antique" spike to find its way into a car tire.  With all this railroad history I thought it might be fitting to use railroad spikes for handles or pulls for our cabinets. I thought it was a pretty original idea until I got online and found some railroad spike knobs selling for about $8/knob.  Okay, so my idea wasn't that original but I was enamored by it at this point. 
Still...$8/knob was a bit out of our budget (truthfully, we'd spent our budget on the cabinets).  So I figured, how hard can it be? We decided to  make our own and we absolutely love them.  Just in case you wanted to make your own as well, here's how we did it.  (If you didn't want to make your own, but still would like some more affordable railroad spike pulls/knobs or hooks, I am attempting to create a link here.)

1st my little girl and I put on our biggest pocketed coats and went walking along the right-of-way near the tracks. NOT ON THE TRACKS. I don't know if its the same all over the country but around here, when they put in new spikes, they put the old spikes in nice, convenient piles along the right of way next to the tracks. We never even had to get on the train tracks to collect our spikes.  We loaded up our pockets 'til the fabric of our coat pockets complained, as did my little girl, and headed for the car.  

2nd, since we were almost to town anyway, we stopped at the hardware store to get supplies.  I used a couple metal cutting discs for my grinder (my favorite tool) a box of self-boring screws, a couple of drill bits for drilling metal (just about the diameter of the core of the self-boring screws) and some clear spray lacquer. 

3rd, I got home, put on my dollar store sunglasses for safety goggles and got to cutting.  I measured the first few spikes and made pencil marks where to cut, until I got a feel for it. If you have a vice to put the spikes in when you are cutting that would be best.  I was too lazy and just went outside to my back step and held the spike under my foot with the head of the spike hanging off.  I was surprised at how well and how quickly the disc on my grinder cut through the railroad spike.  Keep an eye out on your disc for wear though-if the edge looks ragged, hurry and replace the disc before chunks of it lodge somewhere unpleasant in your body.  (If you aren't familiar with using a grinder definitely don't put your hand, foot or leg anywhere near it until you are sure you can control it and operate it proficiently.)

4th, drill 'em.  I looked at the length of my screws and the depth of my cabinet and did my best to drill as little as possible (about a 1/2") into these buggers.  This part took the longest and was the most unpleasant so after doing a bunch myself, I enlisted my husband's help.  Once again we were too lazy to walk outside and over to the rusty old building that houses the vice so we sat on the kitchen floor, put a scrap of wood between the spike head and the floorboards and held the spike with one hand while drilling with the other. Took a few hours and a few drill bits.  When drilling metal, I've had the most success drilling at a slow speed instead of fast (lay off the trigger) while applying pressure but not "tons" of pressure. Otherwise, you break and dull drill bits at amazing speed.  

5th I wanted these metal spikes lacquered up so they shined, were easy to clean and didn't continue to rust so i took them outside and gave them all several coats of clear lacquer using my spray can.  I love that stuff because its easy and quick-drying. Like I said, I'm lazy.

6th We installed these bad boys by marking the spot for the knob on the front and back of the door or drawer. I had my cabinet guys help me because I was new to this project and didn't want to destroy our new cabinets.  They listened to me patiently and  were optimistic about my idea. (Thanks guys!) While it did take some muscle to hold the knob in place while the screw bored its way in, we were done within an hour or so with all 30 knobs on all my cupboards and drawers.  We have absolutely loved them! 

We are now doing our mudroom cabinets and if I can get my little baby boy to actually take a nap without me holding him, I might get these spikes finished and on the cabinets for our family in time for Christmas.  Keep your fingers crossed!